Advertising: Settings | Setup AdMob
Importing AdMob Plugin
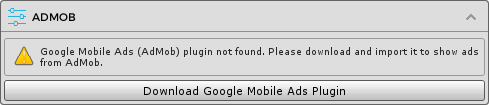
To show ads from AdMob you need to import the Google Mobile Ads plugin. In the ADMOB section, click the Download Google Mobile Ads Plugin button to to open the download page. Download the plugin and import it to your project.
Configuring AdMob
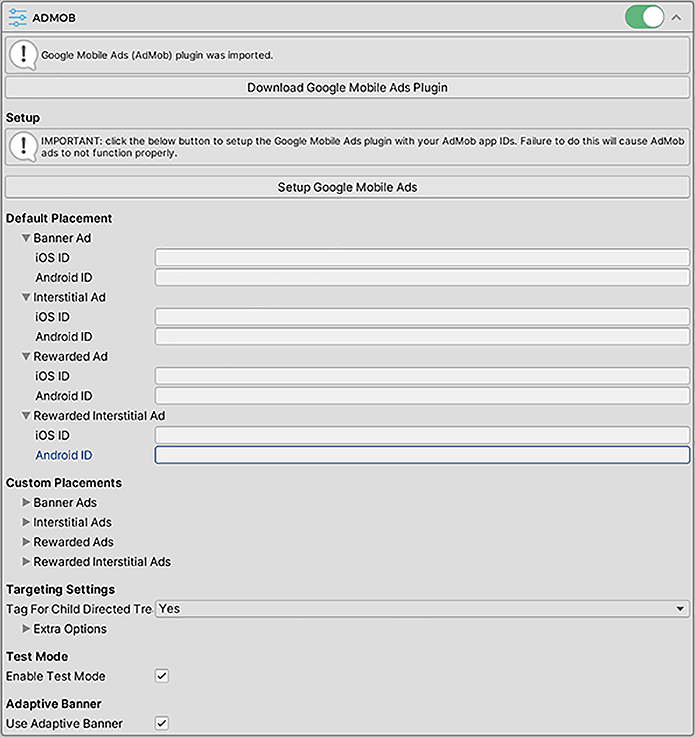
After importing the Google Mobile Ads plugin, the ADMOB section will be updated as below.
Setup
The instructions here apply to Google Mobile Ads Unity plugin version 3.18 or newer.
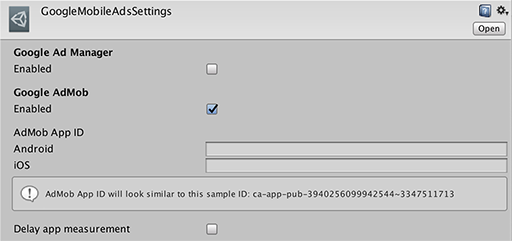
First you need to setup the Google Mobile Ads plugin. Click the Setup Google Mobile Ads button to bring up the settings panel of Google Mobile Ads, which looks similar to the screenshot below. There you simply need to tick the Enable checkbox in the Google AdMob section and enter your AdMob app IDs for the iOS and Android platforms. These app IDs will be reflected back in the ADMOB section in Easy Mobile settings panel.
You can learn more about this step in the guide provided by Google here.
Default Placement
Here you can enter the ad IDs to be used with the default placement for each platform. These are the only ad IDs required if you are not using any custom placements in your app. Note that you only need to provide IDs for the ad types you want to use, e.g. if you only use AdMob banner ads you can leave the interstitial and rewarded ad IDs empty.
If you're not familiar with AdMob, follow the instructions here to create ad units and obtain the ad IDs; an ad ID should have the form of ca-app-pub-0664570763252260xxxxxxxxxxx.
Custom Placements
Here you can optionally enter the ad IDs associated with non-default ad placements to be used in your app. You can have an arbitrary number of custom placements and can use built-in placements or create new placements for your needs.
Targeting Settings
You can provide targeting information for your app in the Targeting Settings section. These settings will be applied to all AdMob ad requests in your app. You can learn more about AdMob ad targeting here.
- Tag For Child Directed Treatment: indicates whether you want Google to treat your content as child-directed when you make an ad request for the purposes of Children's Online Privacy Protection Act (COPPA)
- Extra Options: extra settings in form of key value pairs, e.g. for setting "max_ad_content_rating"
Using AdMob with the Designed for Families program
According to this article, apps that join in to Google Play's Designed for Families program can fall into two categories:
- Primarily child-directed apps: if your app is admitted to the program as a primarily child-directed app, "AdMob will automatically begin serving Designed for Families-compliant ads for all ad requests coming from the app", which means you don't need to specify the child directed setting in your app.
- Mixed-audience apps: if your app targets both child and adult audiences, you need to set the extra key "is_designed_for_families" to true and tag your app for child-directed treatment. You can do that in Easy Mobile settings as below.
Overriding AdMob targeting settings in script
You can override AdMob targeting settings in script by setting the property EM_Settings.Advertising.AdMob.TargetingSettings. All subsequent ad requests will be sent with the new settings.

Adaptive Banner
Adaptive banner is a replacement for the old smart banner. When this option is enabled, Easy Mobile will automatically create an AdMob adaptive banner ad when you show a banner of size BannerAdSize.SmartBanner. Enable this option should you want to use adaptive banner ad instead of smart banner ad. More information about adaptive banner ads can be found here. 
Test Ads
As of this writing (Jan 2021), new iOS apps will not show Google ads until they’re listed in the Apple App Store. In other words, you need to enable AdMob test mode or use test ad IDs to see ads during development. More info here.
To enable AdMob test mode, simply check the Enable Test Mode option under the Test Mode section. It is recommended to do this while your app is still in development. Once the test mode is enabled, Easy Mobile automatically detects your device ID and registers it as a test device while requesting ads from AdMob. More info here.
Another option is to use the test ad IDs provided by Google. Note that you can keep using your own AdMob App IDs in the GoogleMobileAdsSettings.
Setup AdMob Mediation
To setup AdMob mediation please follow this Google's guide. Basically you need to do two things:
- Setup mediation networks for your app on the AdMob dashboard.
- Import the necessary mediation adapters provided by AdMob into your Unity project.
Note that the Easy Mobile's API for AdMob remains the same whether mediation is used or not. That means you won't need to update your advertising scripts after setup mediation. The Google Mobile Ads SDK will automatically handle all mediation activities internally.
Building Notes
The Google Mobile Ads plugin for Unity employs CocoaPods to automatically import the necessary frameworks to the generated Xcode project when an iOS build is performed in Unity. Therefore you need to install CocoaPods to your Mac: please go to https://cocoapods.org/ for install instructions, as well as for more information about CocoaPods. Note that you only need to install CocoaPods, everything else will be done automatically by the Google Mobile Ads plugin.
Recent versions of the Google Play Services Resolver (that is bundled with Easy Mobile) handles the installation of CocoaPods for you automatically.
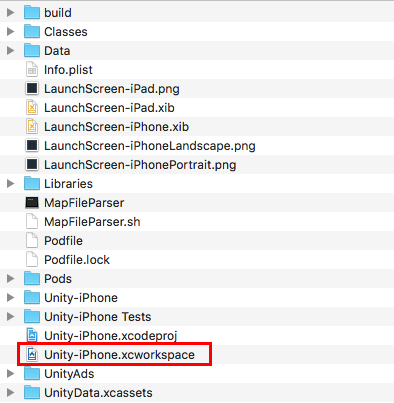
When building for iOS in Unity, CocoaPods will automatically create an Xcode workspace (with .xcworkspace extension) in the generated Xcode project. You should always open this workspace instead of the normal project file (with .xcodeproj extension).
Troubleshooting
If your AdMob ads don't show, check out this article for common reasons.